Key Takeaways
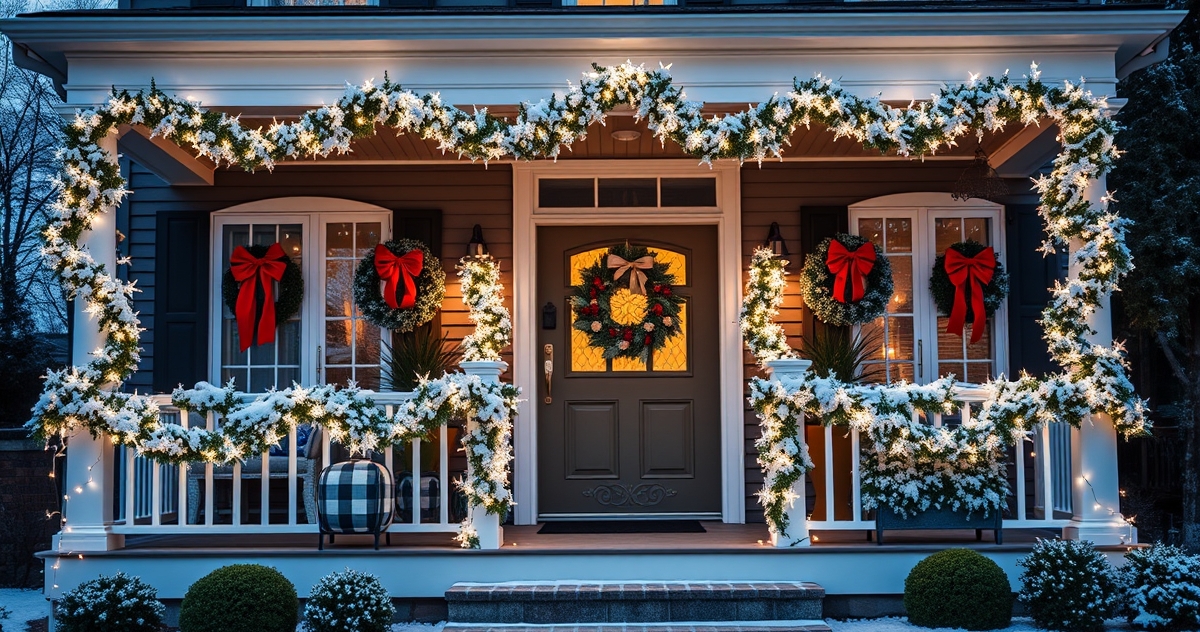
- Layering multiple garland textures and densities creates the visual depth that separates professional displays from DIY attempts.
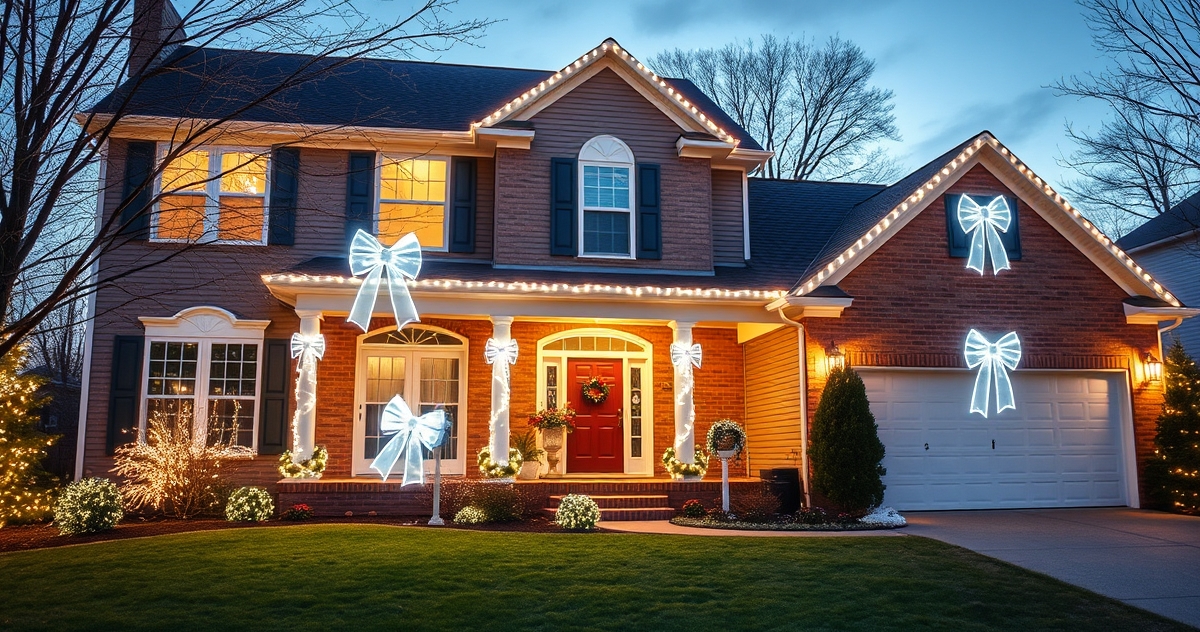
- Strategic bow placement uses architectural focal points rather than uniform spacing for a sophisticated, curated look.
- Weaving lights deep into garland structure—not just draping them on top—produces the warm internal glow that defines high-end installations.
- Proportional awareness and architectural style should guide every decision, from garland thickness to bow size and material.
- Proper securing methods and weather-resistant materials keep displays looking polished from Thanksgiving through New Year's.
The difference between amateur garland placement and professional Christmas garland styling becomes obvious the moment you walk up to a home. While most homeowners simply drape a single garland across a front porch railing, professionals understand that true elegance comes from layering textures, integrating lighting strategically, and placing bows with intentional precision—creating visual depth and sophisticated holiday appeal that stops traffic and makes lasting memories.
After nearly two decades of creating stunning holiday displays for homeowners and businesses across the country, the Holiday Lights Decor network has learned that garland styling is both an art and a science. The most impressive displays don't happen by accident. They result from specific, repeatable techniques that transform ordinary greenery into magazine-worthy décor regardless of the architectural style or climate of your region.
The Foundation: Understanding Garland Texture and Volume
Professional Christmas garland styling begins with recognizing that not all garlands are created equal. The secret to visual interest lies in combining different textures and densities rather than relying on a single garland type throughout a display.
Start with a base garland—typically a full, dense pine or fir garland that provides a foundational green backdrop. This primary layer must be substantial enough to support additional decorative elements while holding its shape through weeks of varying weather. A useful rule of thumb: plan on 9-foot garland sections for standard 8-foot railings, which allows for the natural draping that creates elegant curves and movement.
The magic happens when you introduce secondary texture layers. Eucalyptus branches add a silvery-green contrast; berry-laden stems contribute pops of color and seasonal authenticity. These accent pieces should not overwhelm the base garland but should provide subtle variation that catches the eye and rewards closer inspection.
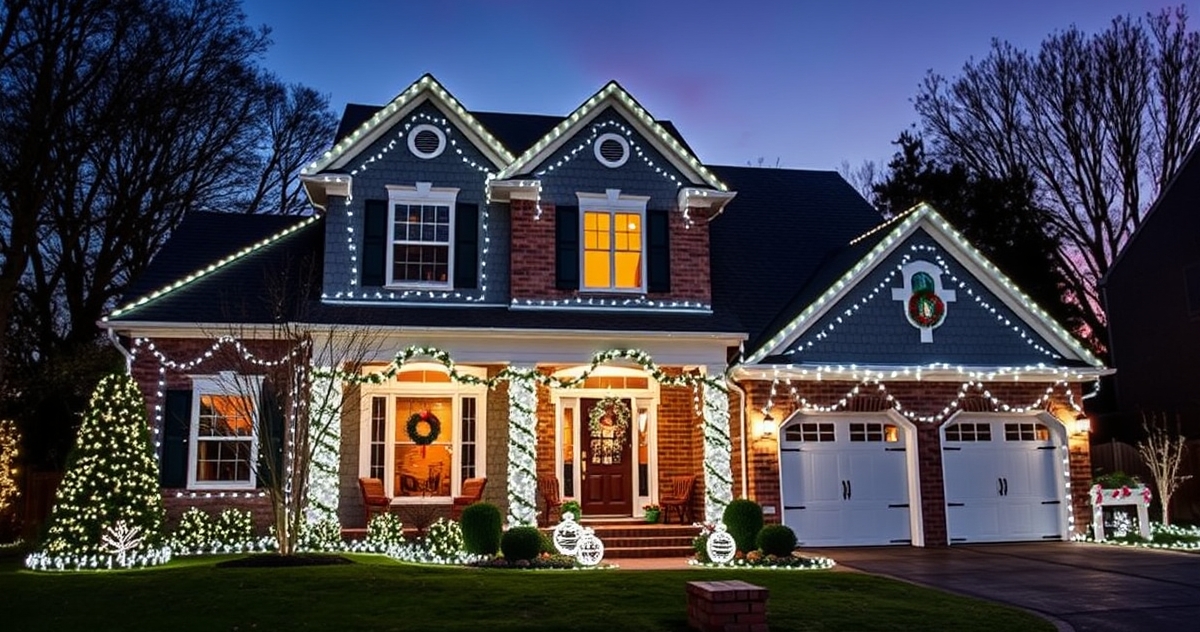
For residential installations, mixing garland densities across different architectural elements works particularly well. Fuller, more dramatic garlands shine at main entrance areas and primary focal points, while lighter, more delicate garlands complement window frames and secondary architectural details without overwhelming the surrounding space.
Strategic Bow Placement: The Professional's Secret Weapon
Nothing elevates a garland display quite like strategically placed bows—but the gap between amateur and professional bow placement is dramatic. The most common mistake homeowners make is placing bows at rigid, uniform intervals, producing a predictable, craft-store appearance that lacks sophistication.
Professional Christmas garland styling uses bows as focal points and visual anchors rather than repetitive decorations. The key is identifying your garland's natural gathering points—areas where the greenery drapes most gracefully or where architectural elements create visual breaks. These become your bow placement opportunities.
Material choice matters as much as location:
- Red velvet bows — Rich contrast against deep green garlands; ideal for traditional Colonial and Victorian homes.
- Gold satin bows — Elegant sophistication for contemporary homes and commercial applications; catch light beautifully and read as luxurious even at a distance.
- Burgundy or navy ribbon — A modern alternative that pairs well with warm white lighting and natural greenery for a refined, non-traditional palette.
Size variation is equally critical. Use larger, more dramatic bows at main focal points—front entrances or the center of long railing runs—and incorporate smaller accent bows at transitional points. This creates a visual hierarchy that guides the eye naturally through the display rather than competing for attention at every point along the garland.
Finally, always install bows after the garland is fully positioned and the lighting is in place. Only then can you identify the true natural focal points and ensure the bows enhance rather than fight other decorative elements.
Lighting Integration: Creating Depth and Warmth
Lighting transforms garland from daytime decoration into evening magic, but achieving that transformation requires understanding how bulb types and placement techniques interact with organic greenery. Warm white mini lights remain the gold standard for garland lighting because they complement natural textures without overwhelming them.
Professional Christmas garland styling uses lighting to build layers of illumination rather than produce uniform brightness. The most important technique: weave lights deep within the garland structure instead of simply draping them across the surface. This creates an internal glow that makes the greenery appear to radiate light naturally—a depth and warmth impossible to achieve with surface-mounted lighting alone.
Use these density guidelines as a starting point:
| Application | Light Density | Effect |
|---|---|---|
| Subtle, elegant accent lighting | ~100 mini lights per 6 ft | Warm glow that enhances without dominating |
| Dramatic residential focal point | ~150 mini lights per 6 ft | Bold brightness with strong visual impact |
| Commercial or grand estate entry | 150–200 mini lights per 6 ft | High-impact, high-visibility display |
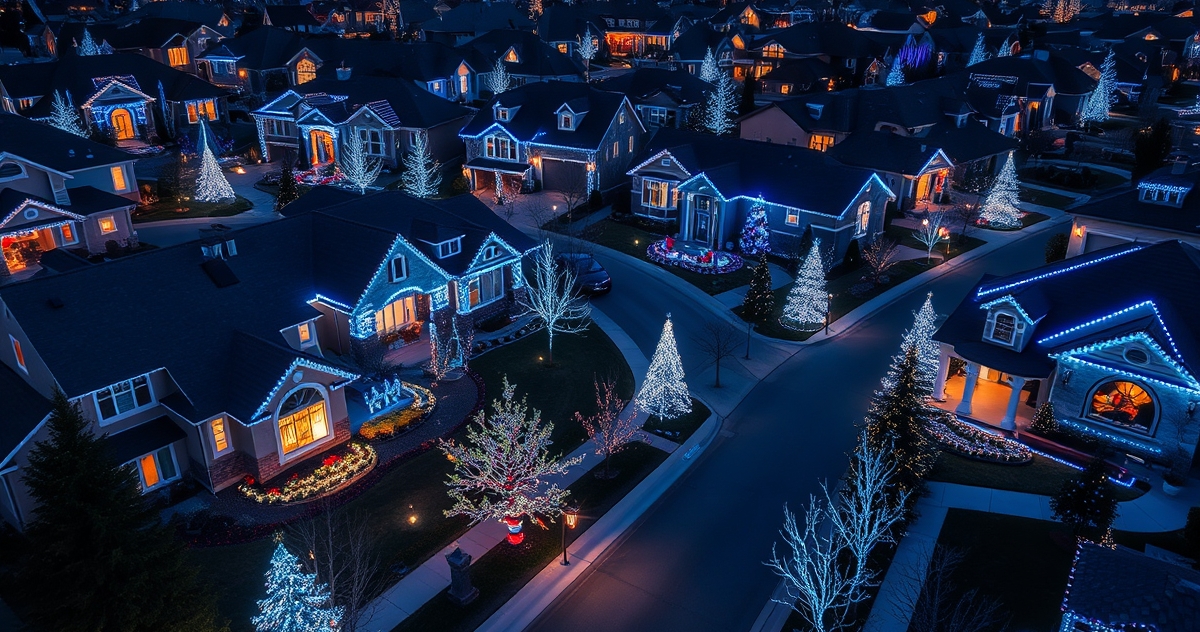
Also consider how garland lighting interacts with the rest of your property's holiday scheme. Garland lights should complement rather than compete with roofline C9 lighting and other architectural elements, creating a cohesive, designed look rather than a collection of unrelated features. Professional installations frequently incorporate timers and dimmers so homeowners can fine-tune brightness for different times of evening and special occasions—adding energy efficiency and flexibility throughout the season.
Advanced Layering Techniques for Maximum Impact
True professional-level garland styling moves beyond single-garland installations to incorporate sophisticated layering that creates extraordinary visual depth. These advanced Christmas garland styling techniques are what truly separate exceptional holiday displays from ordinary ones.
Think of layering in three distinct passes:
- Foundation layer — The dense base garland, properly spaced and naturally draped along your architectural lines.
- Texture layer — Berry branches, eucalyptus, or similar accent materials woven through the base at strategic intervals rather than uniformly, creating interest without obscuring the foundational greenery.
- Accent layer — Pine cones, small ornaments, or subtle metallic elements wired into key focal points. These should look naturally integrated, as if they belong to the garland organically rather than having been attached as an afterthought.
For grand installations, consider incorporating fresh elements alongside your primary garland. Fresh holly branches with bright red berries, wired into an artificial garland at key focal points, provide authentic seasonal color and texture that photographs beautifully and impresses guests from the street.
The governing principle of all layering is restraint. Each additional layer should enhance rather than overwhelm the previous ones. Professional displays achieve their impact through careful selection and precise placement, not through volume of decoration. When in doubt, step back and evaluate from the curb before adding anything more.
Architectural Integration and Proportional Considerations
Professional Christmas garland styling must account for a home's architectural style and proportional relationships. The techniques that work beautifully on a Victorian cottage may overwhelm a minimalist modern home—and vice versa. Across our nationwide franchise network, our teams work with every architectural style imaginable, and proportion is always the guiding principle.
Here's how styling approach shifts by architectural type:
| Architectural Style | Recommended Garland Treatment | Best Bow Choice |
|---|---|---|
| Traditional Colonial | Classic full draping along railings and doorways; balanced symmetry | Red velvet, proportional to trim width |
| Contemporary / Modern | Cleaner lines, streamlined layering, lighting that emphasizes geometry | Gold or champagne satin, minimal accent bows |
| Victorian / Ornate | Multiple texture layers, dramatic draping, elaborate focal-point bows | Rich jewel tones—burgundy, deep green, or gold |
| Craftsman / Bungalow | Natural materials dominant; pinecone and berry accents; warm rustic palette | Plaid or burlap ribbon for organic authenticity |
| Mediterranean / Stucco | Bold, sculptural garland runs with strong light contrast; limit fussy detail | Gold or copper satin for warmth against light walls |
Also think carefully about viewing angles. Front-facing installations should prioritize curb appeal and drive-by visibility. Side and rear installations can afford more intimate detail, creating inviting views from interior windows and outdoor entertaining areas that reward those who spend time on or near the property.
Our residential installation teams conduct a brief architectural assessment before every project precisely to ensure garland proportions, bow sizes, and lighting densities are all calibrated to the specific home—not applied from a generic template.
Seasonal Maintenance and Professional Longevity Tips
Maintaining professional-quality garland displays across weeks of holiday weather—whether that means coastal humidity, northern ice storms, or southern temperature swings—requires proactive maintenance strategies built into the installation from day one.
Positioning for drainage and airflow. Installations that allow natural drainage and air circulation maintain their appearance longer than tightly packed arrangements that trap moisture. Proper spacing between garland and the surface it's attached to makes a measurable difference in how fresh the display looks after weather events.
Bow material selection by climate. Outdoor-rated satin and synthetic ribbon materials generally handle weather exposure better than natural velvet, but both can perform well when positioned to minimize direct water exposure. After significant storms, a quick check to reshape bows keeps them looking intentional rather than wind-battered.
Lighting connections and bulb quality. Professional installations use weather-resistant connectors and high-quality LED bulbs that maintain consistent color temperature and brightness through temperature fluctuations. Inspect connections after any major storm; a loose connection is easier to fix immediately than after it causes a section outage.
For homeowners who want professional results without the ongoing maintenance commitment, our removal and storage services handle end-of-season takedown and proper storage, ensuring your investment arrives next season in the same pristine condition it left—no tangled lights, no crushed bows, no garland shed all over the garage floor.
When to Call a Professional
Some garland projects are well within an ambitious homeowner's reach. Others—multi-story installations, large commercial entries, intricate layered displays spanning an entire property—genuinely benefit from professional expertise and equipment. Beyond the visual results, professional installation means:
- Safe work at height using proper ladders and safety equipment
- Electrical load calculations to prevent tripped breakers or overloaded circuits
- Weather-rated hardware and fasteners appropriate for your specific climate
- A cohesive design vision that accounts for every element on the property simultaneously
- Guaranteed removal on your schedule when the season ends
Whether your project is a single front porch or a comprehensive commercial property display, your local Holiday Lights Decor team brings the same expertise, materials, and craftsmanship that defines our nationwide franchise network. Explore our full range of offerings on our services page to see how we can bring your vision to life this season.
Ready to transform your home's holiday curb appeal? Contact your local Holiday Lights Decor team for a no-obligation design consultation—and let us show you what professional garland styling looks like up close.
Frequently Asked Questions
How much garland do I need for a standard front porch railing?
For standard 8-foot railing sections, plan on 9-foot garland pieces to allow for proper draping and natural curves. The extra foot of length creates the flowing appearance that characterizes professional installations. Measure your total railing length, divide by 8 feet, and that tells you how many 9-foot sections to purchase or request.
What's the best way to secure garland to different railing materials?
The right securing method depends on your railing material. Wood railings accept small finishing nails or cup hooks that leave minimal marks. Vinyl and composite railings work best with zip ties or specialized no-damage clips designed for outdoor use. Metal railings pair well with wire ties or magnetic clips rated for outdoor applications. In all cases, avoid over-tightening, which compresses the garland and diminishes its natural fullness.
Should I install lights before or after hanging the garland?
Install lights after the garland is fully positioned and secured. Once the garland is up and draping naturally, you can see where the density varies and place lights accordingly for even distribution. Weave lights deep into the garland structure rather than draping them across the surface—this creates the warm internal glow that defines professional-quality lighting rather than a string simply lying on top of the greenery.
How do I keep bows looking fresh throughout the holiday season?
Start with weather-resistant materials—outdoor-rated satin or treated synthetic ribbon holds up significantly better than untreated velvet in wet or windy conditions. Position bows to minimize direct water exposure wherever architecture allows, and do a quick check after storms to reshape any bows that have shifted. High-quality bows installed with proper wire armatures inside the loops maintain their shape far better than flimsy alternatives and are worth the investment.
Can I mix different types of garland in the same display?
Absolutely—and you should. Mixing garland types is one of the defining characteristics of professional installations. Combine a full pine or fir base garland with lighter accent materials like eucalyptus sprigs or berry branches. The key is proportion: accent garlands and materials should enhance and complement the primary greenery, not compete with or obscure it. A good rule is that accent layers should account for no more than 25–30% of total visual mass.
How far in advance can garland be installed before it starts to look worn?
High-quality artificial garlands installed in late November typically look excellent through early January with minimal maintenance—a display window of 5–6 weeks. Fresh or mixed-fresh garlands have a shorter window (2–3 weeks before natural elements dry out noticeably) but offer unmatched color and texture during that time. Regardless of material, proper installation that allows for air circulation and drainage is the single biggest factor in how long a display stays looking its best.